So there has been a lot of interest on the Internet in the last few days on how to make my Trapies quilt block. So to celebrate the end of 2014 here's how...
You will need
Paper templates ( the hexagon and trapezium, however you could purchase (or cut out) a large bunch of hexagons and cut them in half for the trapezium) my hexagons and trapeziums are 1 1/2inches however they would work with anything
Tacking thread
Sewing thread (I like to tack with something cheap that I will throw away later however when quilting I always use 100% cotton
Needle, scissors
Fabric - for my actual quilt I am using a jelly roll (Mixed Bag by moda) and a fat quarter of white fabric (sorry don't know the name as I had it lounging in the sewing room)
Something to hold the fabric while you tack - I personally use clover clips however when I teach this at school we use paper clips - they work just as well; in the photographs below just picture a paper clip in place of the clover clip. You will use it in the same place
How to prepare the hexagons and trapeziums
This is the same for both the hexagon and trapezium however for the trapezium I used a template that looked like this:
You will notice it is the same shape as the trapezium with a rough seam allowance - I actually made the height the same as the jelly roll so that I reduced the amount of waste and gave them a uniformed look.
Lay the paper template in the middle of the fabric on the wrong side
Pin the fabric down to make it secure (on the trapeziums I do this on two opposite sides, on the hexagons I did this on 3 sides)
Make a tacking stitch through the corners of the shape, ensuring that you carefully fold the fabric down around the paper to create a very crisp edge.
Once complete it should look like this.
Remove the clips and ensure that the shape on the front is as the paper template was.
To create the Trapies block
You will need:
6 trapeziums in 2 seperate colours ( a jelly roll strip yields 14 trapeziums allowing you to achieve 2 full blocks with 2 contrasting coloured trapeziums)
1 hexagon
(As well as your sewing thread and scissors)
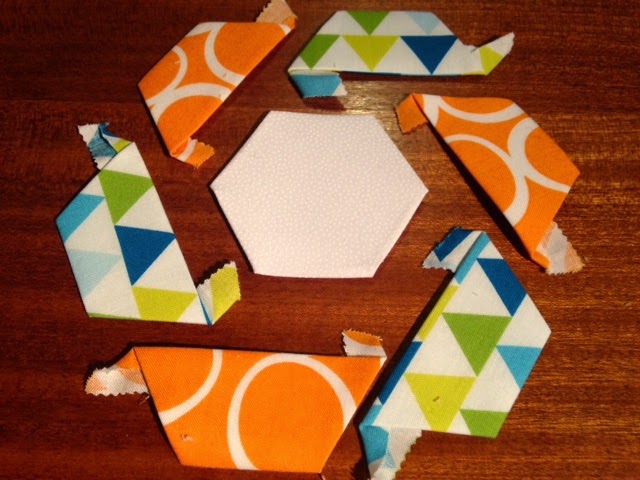
Lay 3 of each of the trapeziums around the hexagon so that they over lap the edge of the hexagon and the short edge of the next trapezium. (As below)
You're going to want to work on these in a circular motion - because of the way I have laid these out I need to sew anti clockwise.
You will want to work on the pieces one at a time, so take your pick which one.
Pop your right sides together ensuring the left hand side of both pieces perfectly line up (this will make the end of this ring easier)
Slip or whip stitch along this edge.
Should open out to look like this
Take your second trapezium (remember I'm working anti clockwise) you want to take the trapezium that will mean you're seeing along straight edges.
Once stitched it should look like this
Continue working your way around the circumference of the hexagon like so:
This last one is the most complicated part of the entire block - but honestly this isn't that difficult either.
We're going to start sewing along the same edge that we have used for all the rest of the blocks , however in the photograph below I flipped the pieces over so that the trapezium I'm attaching is ontop of the hexagon undeneath.
Sew as before from the left edge up to the point where the other trapezium is attached to the hexagon.
At this point add a couple of securing stitches
Open the pieces back out so you can see where the next piece needs to join.
If you fold carefully you will see that the paper naturally folds to create another straight line to sew around, and finish sewing to the edge.
You should now have a shape that looks something like this
Now on to the outer ring. Lay the rest of your trapezium pieces out so that they alternate around the hexagon. You want the new trapezium to have the same colour as the short edge of the same coloured trapezium from the ring before (yeah I'm aware this probably doesn't make any sense so see the photo below)
The great thing about sewing them on to the previous ring is you can use the same thread all the way round without finishing off, as where one ends the next one starts.
Leaving you with a stunning block that looks like this
front
And back
If you have a go I would love to see so please coment below. There's a hashtag on Instagram already running #trapiesquilt so please tag.


